

Dual-Handle vs Single-Hole Faucets: Which to Choose?
Choosing between a dual handle faucet and a single hole faucet may seem like a small decision but in bathroom

Ready to upgrade your kitchen? Installing a sink yourself can save money and make a big difference. This guide will show you how to replace a drop-in sink like a pro. It’s perfect for both experienced DIYers and beginners.
Drop-in sinks are loved for their simplicity and fit most countertops well. With the right tools and a bit of knowledge, you can replace your sink in a few hours. Say hello to a new look in your kitchen.
Drop-in sinks are a favorite among homeowners. They fit into a pre-cut hole in the countertop, making installation simple. These sinks come in various styles, from single to double bowls, and are made from materials like stainless steel or composite.
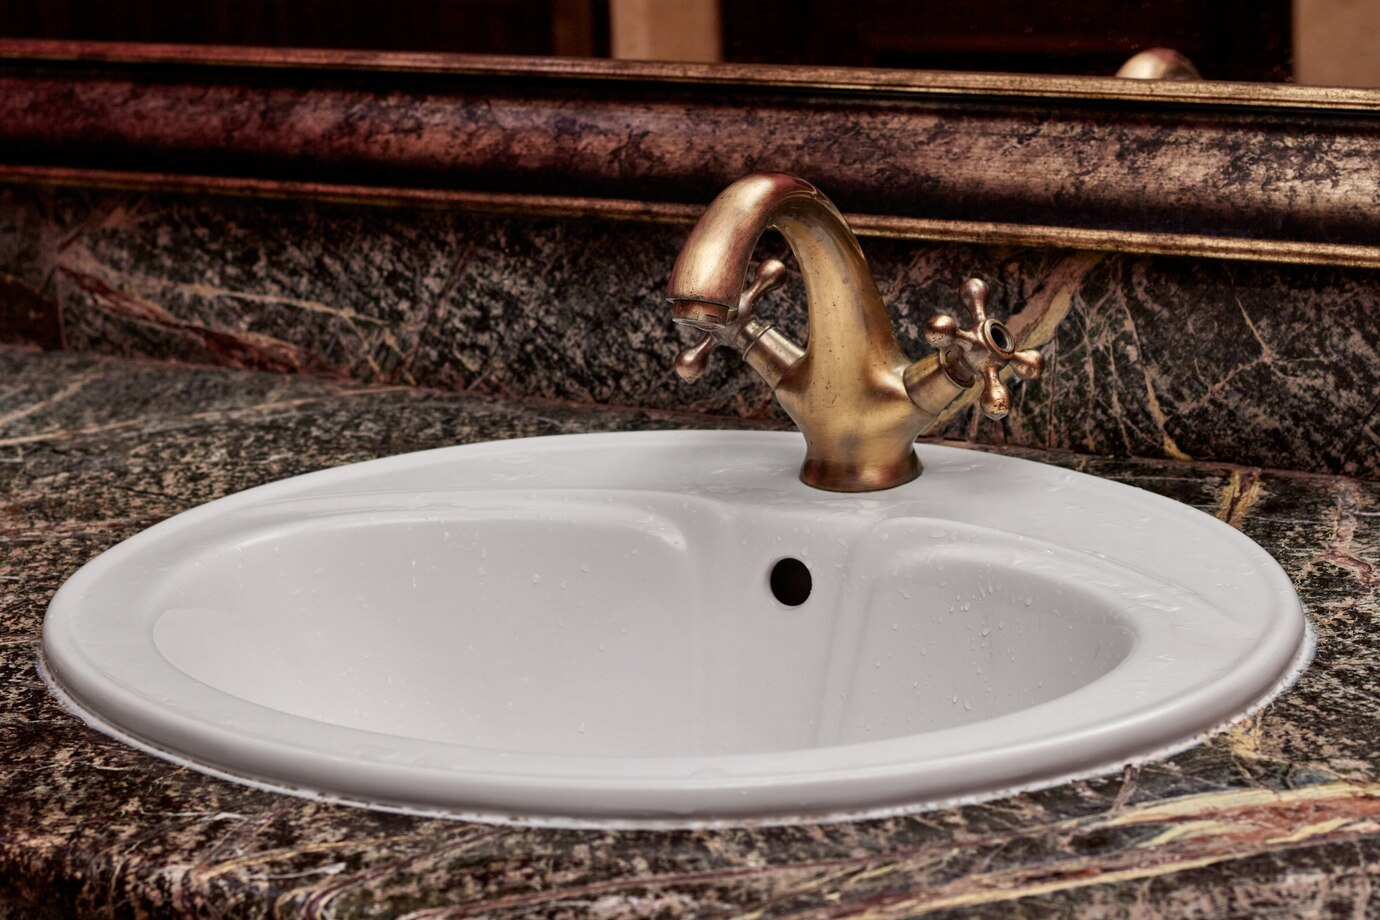
A drop-in sink, also known as a top-mount sink, sits on top of the counter. It has a lip around the edge that keeps it in place. These sinks are common in kitchens and bathrooms. They fit many countertop materials, including laminate, which is not suitable for other sink types.
Benefits of Installing a Drop-In Sink
There are several benefits to installing a drop-in sink. They are often cheaper than other types. Plus, they are easier to install, which can save on costs. These sinks also protect the edges of the cutout, which is good for softer countertops. Cleaning is simple due to their design. Drop-in sinks come in many styles, so you can find one that fits your taste and budget.
To install a drop-in sink, you’ll need some basic tools. Here’s a list: – Measuring tape – Pencil – Silicone sealant – Screwdriver – Plumber’s putty – Adjustable wrench – Safety glasses You’ll also need the sink itself and any required plumbing parts. Having these tools ready will make your installation smoother and faster.
Getting ready to install your drop-in sink is all about planning and precision. The right preparation makes the installation smooth and looks professional. Let’s go over the essential steps to get your new sink ready.
Measuring your sink space accurately is key. Check your cabinet width and the current sink opening. Make sure to double-check these to avoid mistakes. Pick a sink that fits your space and meets your needs. Many people choose drop-in sinks for their easy setup.
Removing the old sink is the next step. First, turn off the water supply and disconnect the plumbing. Loosen the clips and cut through any sealant. Then, lift out the old sink carefully. This usually takes about an hour. Always wear protective gear when removing.
Preparing the Countertop for Installation
Preparing the countertop is crucial for a good installation. Clean the area well, removing all debris and old sealant. Measure and mark the cutout area carefully for new installations. Follow the manufacturer’s instructions or use a sink template for accuracy. This ensures a tight seal and avoids future problems.
After these steps, you’re set for the installation. Remember, careful preparation makes the installation smoother and the results better.
Installing a drop-in sink is a DIY project that can look professional. It involves four main steps: placing the sink, applying sealant, securing it, and connecting the plumbing. Let’s go through each step for a successful installation.
Begin by placing the sink in the countertop cutout. Make sure it fits well and is aligned right. For new setups, choose the widest sink that fits your base cabinet.
After placing, remove the sink and apply silicone sealant around the cutout rim. This step is key to stop water leaks and create a tight seal.
Put the sink back in the cutout, pressing it against the sealant. Use clips or brackets to hold the sink to the countertop. Tighten these clips evenly to avoid any warping or misalignment.
The last step is to connect the plumbing. Install the faucet, basket strainer, and any extra parts like a garbage disposal. Connect the water lines and drain pipes, making sure they fit right. Always check for leaks by running water and checking all connections.
Always follow the manufacturer’s guide for installing specific parts. For example, when installing a Sinkology Raphael double-bowl drop-in kitchen copper sink, use the right disposal flange and garbage disposal system for best results.
Getting the sink aligned right is crucial for a good install. Measure the sink base cabinet carefully. Make sure it fits well with your new sink. This avoids problems with fit and function later.
Use a level to check if your sink is flat on the countertop. If it’s not, you might face drainage issues and water pooling. When securing the sink, apply even pressure to prevent it from warping.
Choose quality sealants for a tight seal. Apply silicone caulk around the sink opening before placing it. This stops water damage to your countertops and cabinets. Use strong mounting clips, spread out evenly for a secure hold.
Here are some common mistakes to steer clear of:
Take your time, follow the manufacturer’s instructions, and double-check your work. This ensures a professional finish.
Installing a drop-in sink can make your kitchen better and look great. With good planning and focus on details, you can get a professional-looking sink. It will last a long time.
For a sink that lasts, use top-notch materials and take your time. Make sure it’s sealed well and mounted right. Regular checks and resealing keep your sink working and looking good. This way, you’ll have a beautiful and useful sink for many years.
Choosing a drop-in sink and installing it right can save you money. With the right care, your sink will be a kitchen highlight. It will be both useful and stylish for a long time.
Choosing between a dual handle faucet and a single hole faucet may seem like a small decision but in bathroom
Receive your order to your door address anywhere in the world using our shipping partners
You're covered by our 30 days return policy
Big part of our reviews testifies about the quality of support provided
Secured payments using renowned payment gateways